Users with access to Authentication settings in Visma Connect with Sticos has to log in to https://authenticationsettings.connect.visma.com/
This access has to be given to a user connected to the company in Sticos systems.
Please contact Sticos to have this access given to the correct person.
1. Domains
The first step is to go to the tab Domains and add the email-domain(s) that will be used with this SSO authentication. At least one domain has to be added. (i.e. sticos.no) If you have users with different domains in the same Azure tenant, all domains have to be added here.
Click Add domain and enter your domain that should be added first and click next.. (Repeat for more domains)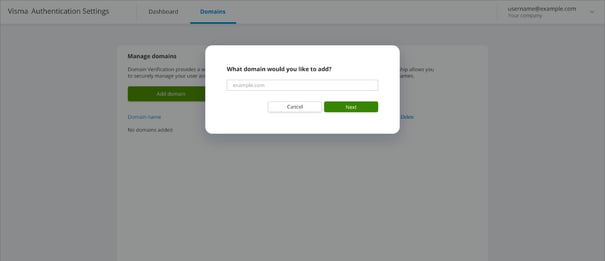
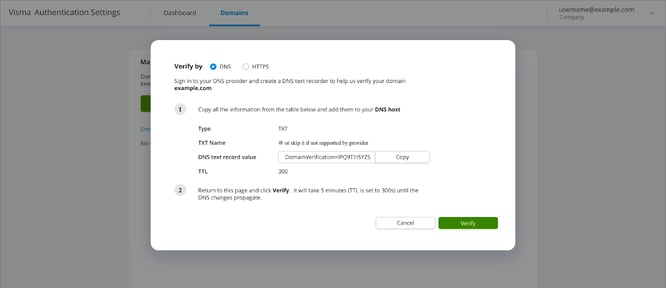
This page gives the necessary information needed to confirm the ownership of the domain, either by adding a DNS entry (easiest) or by downloading a file and putting it on the domain's web-server.
Remember that at least one domain has to be confirmed before going further.
All functions in Authentication settings have a built-in help in the questionmark in the top right corner.
2. Single Sign-On configuration
On the Single Sign-On tab, you need to set up MyDomain before you can add your own identity provider. Tap the Add MyDomain button.
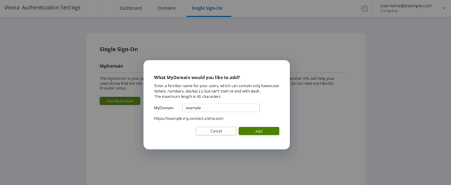
This is used to host your company's SAML endpoints and login page for Visma. If your company name is Example, you may want to choose "example" as your MyDomain. Then your MyDomain will be available on https://example.my.connect.visma.com.
MyDomain can only contain lowercase letters, numbers, hyphens (-), but cannot start or end with a hyphen. The maximum number of characters is 40.
Click Add and continue using the MyDomain you prefer.
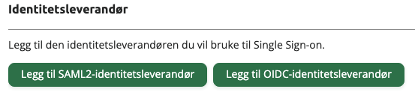
In the Single Sign-on - Identity Provider section, click the Add OIDC Identity Provider or Add SAML2 Identity Provider
button and select Azure/EntraID, AD, ADFS, Google Workspace, Others and follow the instructions in the next section.
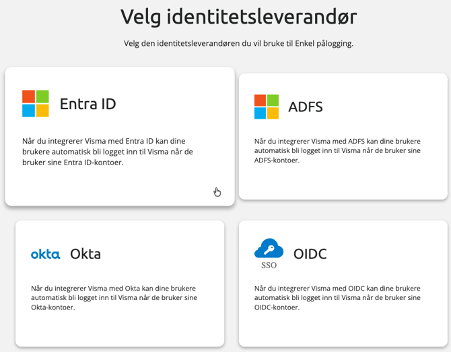
Here is a recipe for setting up against SAML2 EntraID (Recommended when setting up SCIM provisioning and synchronization of users and groups), but other systems can be found here: https://docs.connect.visma.com/docs/single-sign-on
- Tap Add SAML2 Identity Provider and select Entra ID
Download the Metadata File - In a new browser window, go to https://portal.azure.com Log in with your admin user and go to EntraID - Enterprise applications
- Press the button + New registration above the list of applications
Then press + Create your own application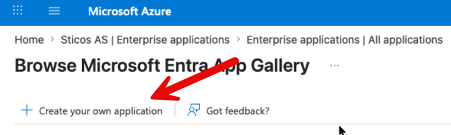
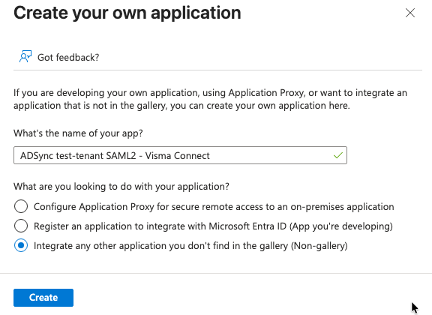
Enter a name for the application. Note that the application is linked to Visma Connect, but also synchronizes to Sticos if it is set up. Select Integrate any other application you don't find in the gallery and press Create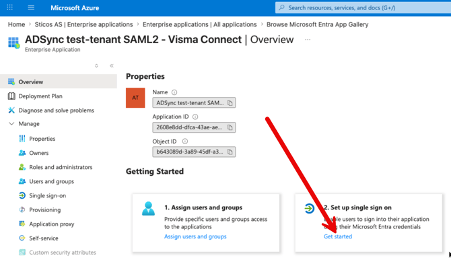
Press Get started under Set up single sign on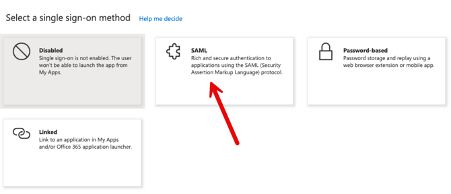
Select SAML as the single sign-on method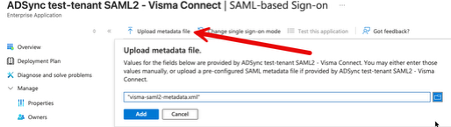
Click Upload metadata file, find the file you downloaded from the Visma Connect - Authenticationsettings page and add. Then click Save on the Basic SAML Configuration page that appears- Under Attributes & Claims, the default setup will suit most people, but if you have a different UPN address than a standard email address, I would recommend changing this, as we do not distinguish between UPN or email address in Visma Connect or Sticos.
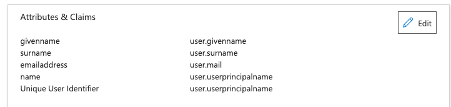
If you have another address such as d0202@domene.no I would recommend clicking Edit here and changing the Unique User Identifier (Name ID) to user.mail instead of user.userprincipalname 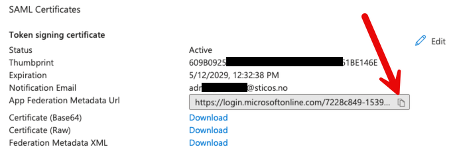
Copy the App Federation Metadata Url from EntraID and paste into Visma ConnectPress then Preview data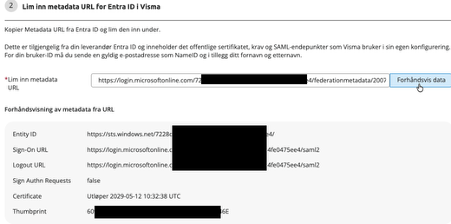
Note that the certificate here has a certain lifespan before you have to go to this page and press the button above which is now called Load data again.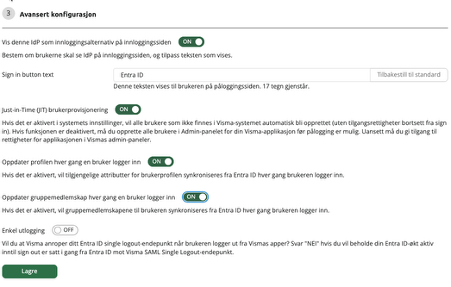
Choose whether the new IdP you add should appear on the login page if you enter an email with a matching domain, and select any text that should appear on the button.- It is recommended to enable Just-in-Time (JIT) user provisioning so that new employees can have users created automatically upon first login. As well as update profile and group membership when logging in.
- Tap Save
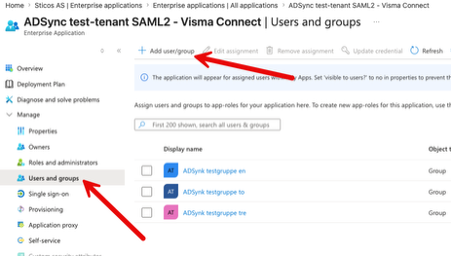
Under Users and groups, you add users and/or groups who will be able to use this application to log in to Visma Connect and Sticos.- After all the setup above is completed, you who are set up as an authentication admin for the customer must log in to this link with the value from MyDomain inserted at the end (use an incognito window):https://sticoslogin-client.sticos.no/?acr_values=urn:idp:SAML- (or OIDC- if you have set up SSO with OIDC setup)
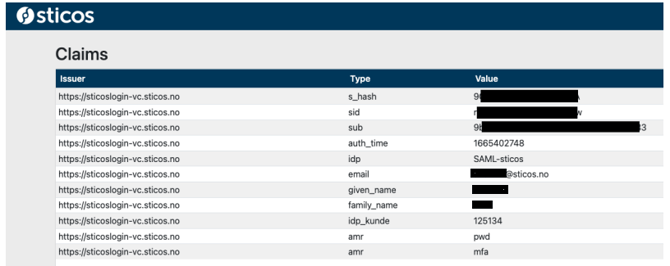
e. for the customer Example with MyDomain "example" in the description above, the admin there should medhttps://sticoslogin-client.sticos.no/?acr_values=urn:idp:SAML-exampleDu should now get a page that looks like this: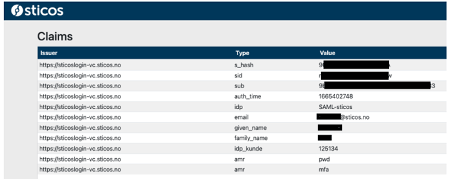
This test must be performed with a user who has the same email address from EntraID as a user who exists on the customer you are setting up SSO for.
3. Provisioning of users from your own domain. (Optional but recommended)
The System for Cross-domain Identity Management (SCIM) specification is used to perform
provisioning (synchronization) between your system and VismaConnect which is the login system chosen by Sticos.
This only works for Azure-EntraID, Okta and OneLogin as of 2026.
After you have configured your identity provider (Azure-EntraID, Okta, OneLogin, etc.) and selected the attributes you want to synchronize with external applications, the user profile is automatically updated when changes are detected.
Make sure you have tested the link above before activating SCIM synkronization.
Confirm this with your support contact in Sticos before testing SCIM synk/provisioning, to make sure all users will be created in Sticos at syncronization.
The recipe below describes how to set this up with EntraID and based on the fact that you have set up SSO with EntraID and SAML2 according to the recipe above. (You can set up Provisioning/SCIM against EntraID if you have set up EntraID with OIDC in the previous step as well, but then you will need to create a new application in Enterprise applications for SCIM provisioning.)
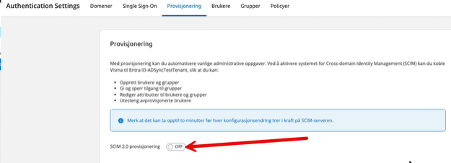
Go to the Provisioning tab in Visma Connect Authentication Settings and turn on SCIM 2.0 provisioning.- Copy SCIM endpoint and go to EntraID and the application you have created under Enterprise applications
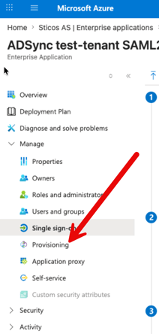
Click Provisioning in the menu on the left side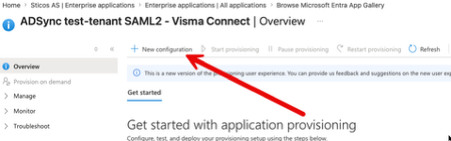
Press + New configuration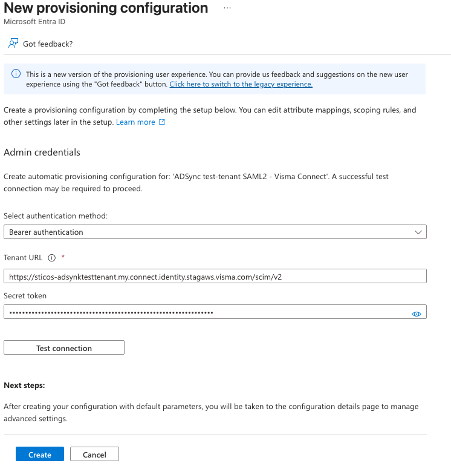
Paste SCIM endpoint from Visma Connect under Tenant URL
Also press Generate SCIM token in Visma Connect and paste token under Secret token. Press Test connection and Create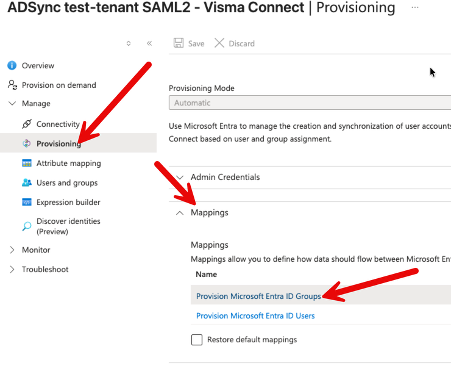
Go to Provisioning, expand Mappings, and tap Provision Microsoft Entra ID Groups
Press Edit on displayName and change the Matching precedence to 2 and press OK- Then click Edit on externalId
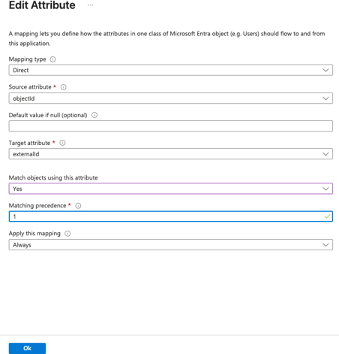
Change Match objects using this attribute to Yes and set the Matching precedence to 1. (This keeps the same group in sync if you change the name of groups later)Press OK 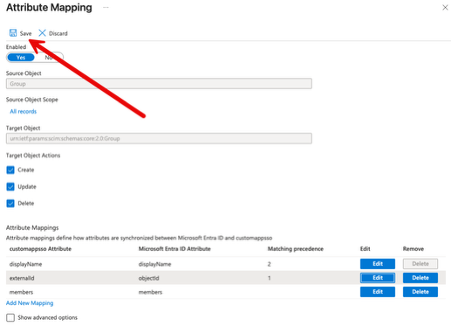
Press Save and Yes. (We haven't activated sync yet)
Close the attribute mapping window with the x in the top right.- Then click on Provision Microsoft Entra ID Users to change the mapping there as well

Click Edit on the userName and change the Matching precedence to 2. (This is also to keep the same user if you change the UPN/email address of the user)Here you must also change the mapping from userPrincipalName to email if you changed the mapping on the SSO setup earlier. Press OK
Click Edit on externalID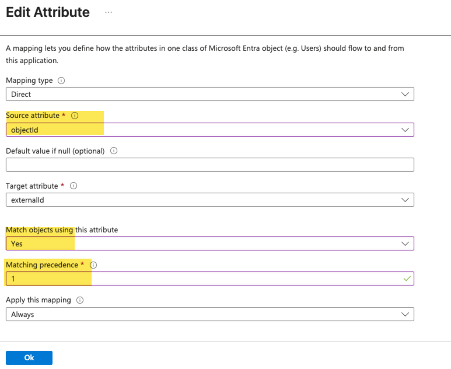
Change the Source attribute to objectId, set Yes to Match objects and set the Matching precedence to 1. Press OK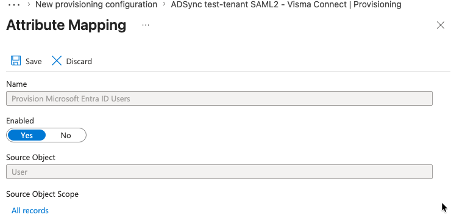
Press Save, Yes and the cross in the upper right corner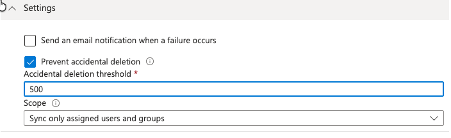
Under Settings, you can set up email notifications if sync fails, and Prevent accidental deletion is automatically active. Scope is also set to Sync only assigned users and groups by default, and this is fine.- Under Users and groups, select which users and/or groups to synchronize.
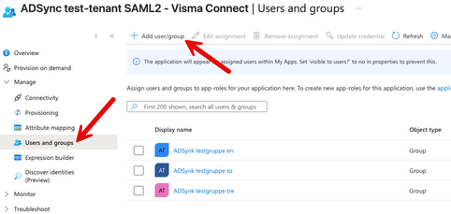
This is where users and groups that are already connected to the SSO application will be located and will have access. All users who are members of one or more of the groups added here will be synchronized to Visma Connect. - In Visma Connect - Authentication settings:
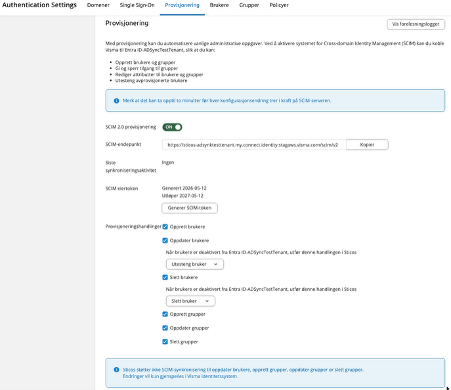
Put a check mark on all fields on provisioning. We also recommend changing to Ban user on update users (This will prevent logging in if you deactivate a user in EntraID)
We also recommend setting Delete user to Delete users. This deletes the user in Visma Connect and in Sticos when you delete the user in EntraID. (Note: EntraID usually has a quarantine for 30 days before the user is actually deleted)
As of today, it says that Sticos does not support SCIM synchronization of updates on users, or any sync of groups. This is partly true, but groups can be used in Sticos Personal/Handbooks, and Sticos is working on further synchronization of groups. Deactivating users will work. - Go to Provision on demand in EntraID to test the setup and see that users/groups are synchronized
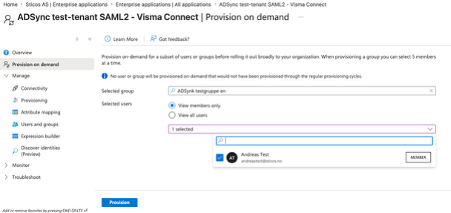
Selecta user or a group and user as in my example and press Provision
Hopefully you will now have success on the synchronization, and you will be able to see in Visma Connect if the group/user has been synchronized.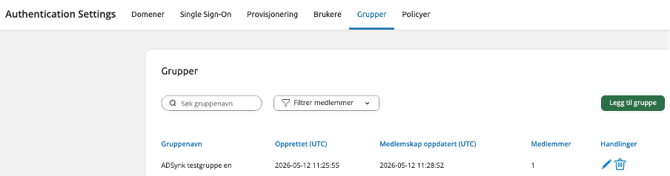
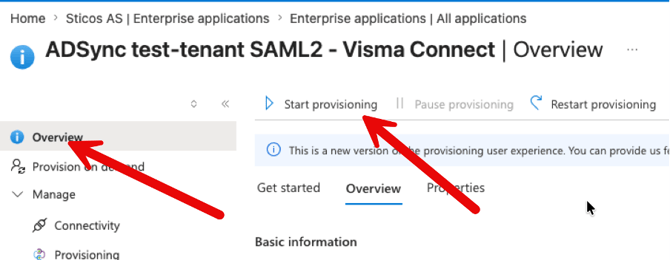
Go to Overview and click Start provisioning when you are ready to start synchronizing users and groups to Visma Connect and Sticos.Note that synchronization does not start immediately from EntraID, so if you need to get groups and users synchronized right away, you can use Provision on demand.
The help page in Visma Connect contains more documentation about setting up SCIM provisioning from EntraID to Visma Connect and Sticos and from any other systems.
Note that when you have activated automatic provisioning, a sync will run from Azure-EntraID to Visma Connect and to the License Overview.
This sync may create new users in Visma Connect that are not already there, and further in to the License Overview. Here it is a good idea to only link users to the application in EntraID that is to be created in Visma Connect and in Sticos. It is probably not a good idea to use Domain Users or such a group, as you get many system users who do not need to enter. Add groups of employees/contractors/consultants or similar.
Note that if you activate synchronization with the option to delete users as shown in the image below and your users are not linked to the application you created in EntraID, the users will be deactivated in Visma Connect and Sticos so that you cannot log in.
The first SCIM synchronization will be able to disable users in Visma Connect who are not linked/added as users or groups in the synchronization application in EntraID, unless the users are linked to other applications in Visma Connect.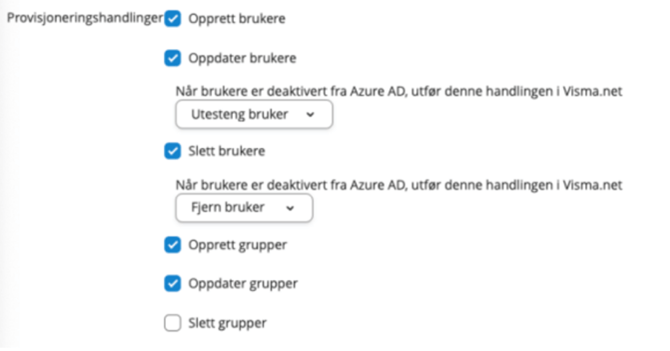
Currently, only Stico's Manuals can benefit from group synchronization. With this functionality, Manuals can automatically assign group memberships and thus different manuals to users upon login. This assumes that group synchronization is activated and then the functionality must be turned on in Stico's Manuals and you must enter the exact same group name as in EntraID/Visma Connect on the group setup in Manuals.
As you can see from the options set up in the example above, when
a user in Azure-EntraID is disabled, sign-in for users in Visma Connect and Stico's applications is disabled.
No changes are made to the Sticos products upon deactivation, but the user will not be able to log in as the login user in Visma Connect is blocked.
When users are deleted from EntraID, they end up in a "trash can" in EntraID before they are automatically deleted after 30 days. Then users will also be deleted in Visma Connect and in Sticos.
4. Policies for choosing allowed identity providers.
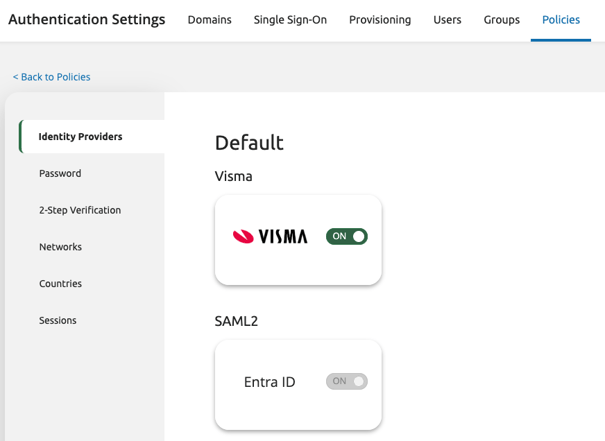
On this page you may choose whether your users should be able to log in with Visma/Sticos users with email and local password, or only with your own identity provider (AzureAD/ADFS).
By disabling VISMA on this page, you will force users to authenticate with your identity provider. This is based on the domain(s) added on the first step.
The behaviour is like this when users tries to log on from our portal at www.sticos.no and choosing to log on to a product from the menu there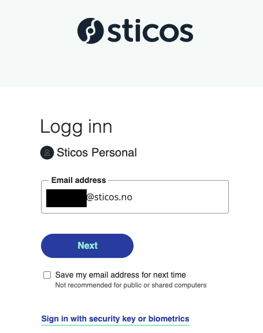
When clicking next on this page, the user is redirected to your identity provider if VISMA is disabled.
If both providers are active, the user will come to this page where he can choose to enter his password in our systems or choose to use AzureAD/ADFS or even password free with fingerprint/FaceID/WindowsHello.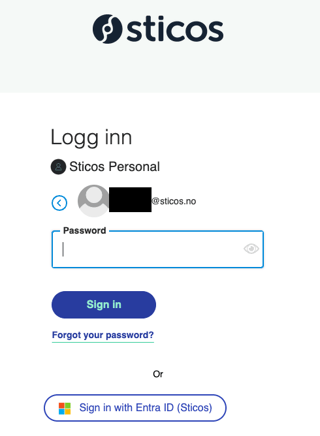
Note that if you deactivate any choices for authentication on this page, it will affect all applications that use Visma Connect for authentication.
Programs like Visma Enterprise plus use ID-porten/BankID for authentication, some other applications in the Visma family might also require other than Password/SAML authentication.
5. Test and connecting identity provider to Sticos products.
After finishing all the above configurations the user with Authentication admin access has to log on to this page with the value from MyDomain inserted at the end of the link (use an incognito window):
https://sticoslogin-client.sticos.no/?acr_values=urn:idp:SAML- (or replace SAML- with OIDC- if you set up a OIDC identity provider)
So for the Example customer with MyDomain “example” in the documentation above, the authentication admin have to log on to this link: https://sticoslogin-client.sticos.no/?acr_values=urn:idp:SAML-example
You should come to a page looking like this: